Tuesday 18 February 2014

On location animal photography across the South East

I've recently turned to on-location outdoor animal photography, and it looks like this will be a significant part of what I'll be doing now. Initially starting with dog photography, it's likely I'll be covering horse photography as well.

My main interest is in action shots of your dogs, at full speed, doing what they love best, but of course a selection of images of your dog wouldn't be complete without a good range of portrait shots too.

Details can be found through my animal photography website and my Facebook page


This blog is unlikely to be updated in the future, but do follow me across to my new site. Thanks.

Tuesday 2 March 2010

Sport Processing

A post over at Ronan Palliser's blog got me thinking about this today.

In general terms when I process my rugby shots I work in Photoshop and have a set 'Action' that I use as a starting point for each photo. If you use Photoshop but have never used actions, you should! They're a fantastic time-saver used individually, and when combined with the 'Automate' function will save you hours on repetitive tasks. I shoot 150 - 250 photos each match and process around 40 - 60 of them. I always shoot Jpegs for sport. I don't need the quality given by RAW (which I use for everything else) and I don't need the extra processing steps that RAW requires.

My standard sport action simply applies auto-contrast, a little sharpening and resizes the image. The Nikon D700 is a fantastic camera and the images come out almost perfect every time.

Every now and again I like to try something a little different and I know these won't be to everyone's taste...

100206-TWRFC-192-rev

This is the Tunbridge Wells captain after his last match before a 5 week break working as part of the PR team with Lawrence Dallaglio on his Cycle Slam around the 6 Nations Stadiums. I boosted the contrast massively, dropped the saturation right back, added in some sepia and finished it off with a vignette.

091003-079-bw

I felt this one benefited from Black and White. Again I have an action set up for this, and then tweak it once it's done. It's a standard Portrait B&W which I then boosted contrast on to give it some added punch.

100220-TWRFC-116

This is a standard shot using standard processing. Really pleased with it as a photo and left it alone!

100209-SK-246vigsep

Finally, this had the same treatment as the first shot, but with added everything! Yes it's an acquired taste, but certainly with this age group it seems to go down well. These images are best viewed by clicking on them and looking at them at their largest.

Tuesday 20 October 2009

Sport Photography

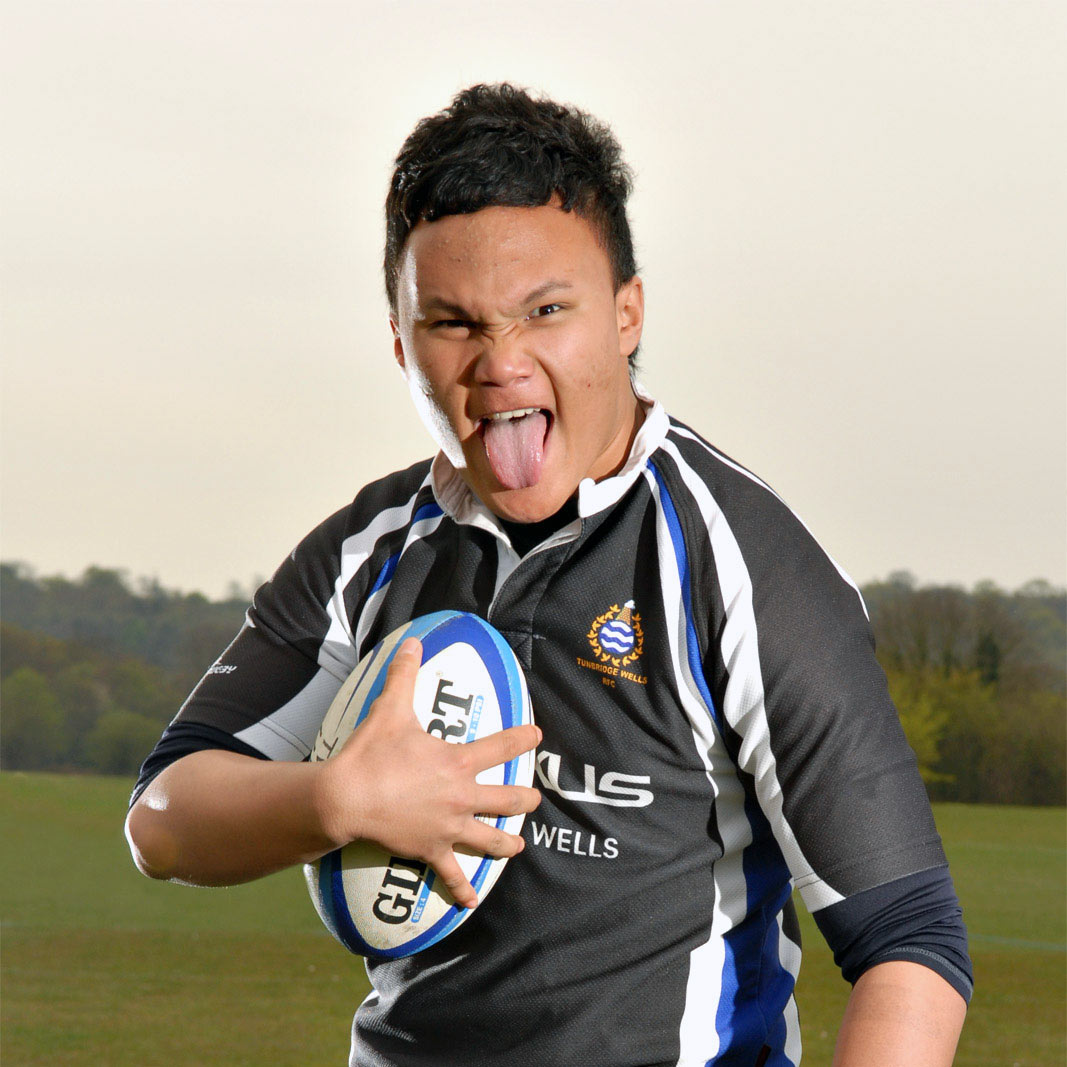
Most of this was written with Rugby, at a local level, in mind. It will apply just as readily to other sports though.

You don’t need the newest and most expensive camera out there to get the best shots. You do need a camera with an instant shutter, and you will need a lens that goes out to at least 200mm… at a minimum. Realistically I wouldn’t want to try and shoot sports with a compact camera… but it might be fun to try!

090926-093

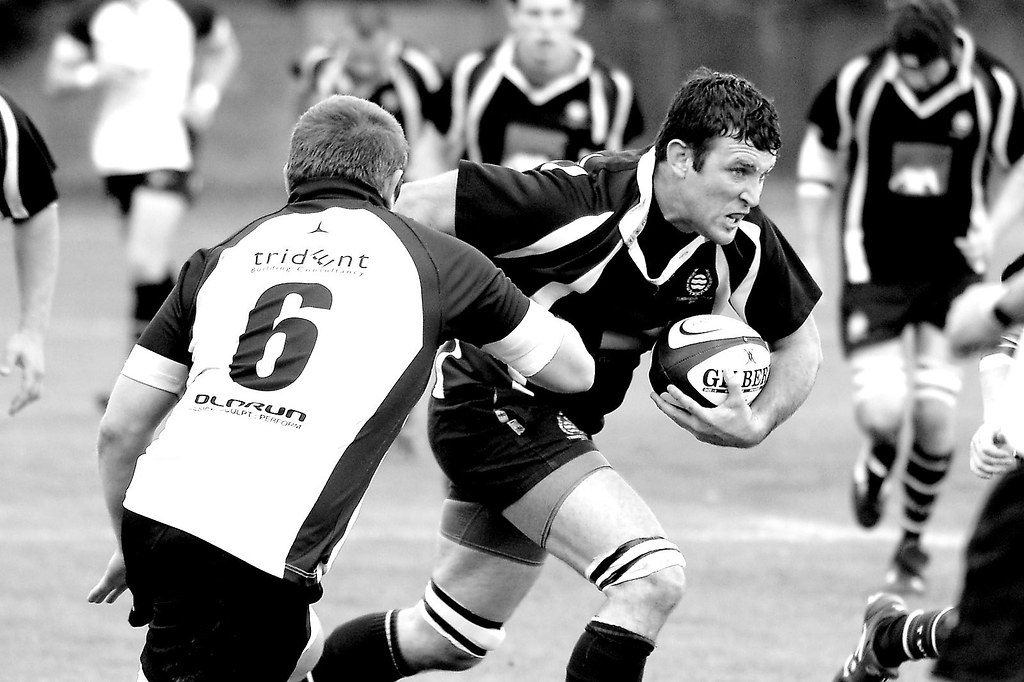
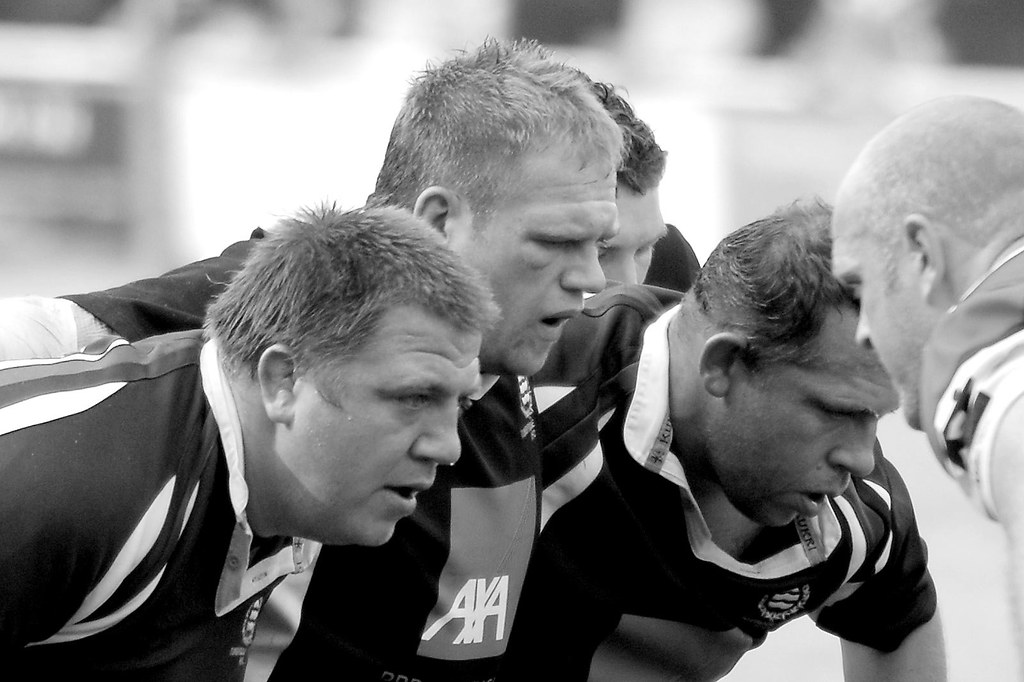
The first and best piece of advice I would offer to anyone thinking of trying their hand at any sort of action photography is that if you see it in your viewfinder, you’ve missed it! You need to anticipate the hit or shot or whatever it may be in the sport you’re watching.

090926-061

With any sort of sport you also need to watch some before you go and photograph it. You need an idea of what is likely to happen and to click that shutter just at the right time.

090919-118

If you haven’t shot a given sport before I would also research online ahead of going if possible. There are lots of free resources online now. Look for images of the sport you want to shoot and see what type of photographs have the most impact for you.

090919-025-bw

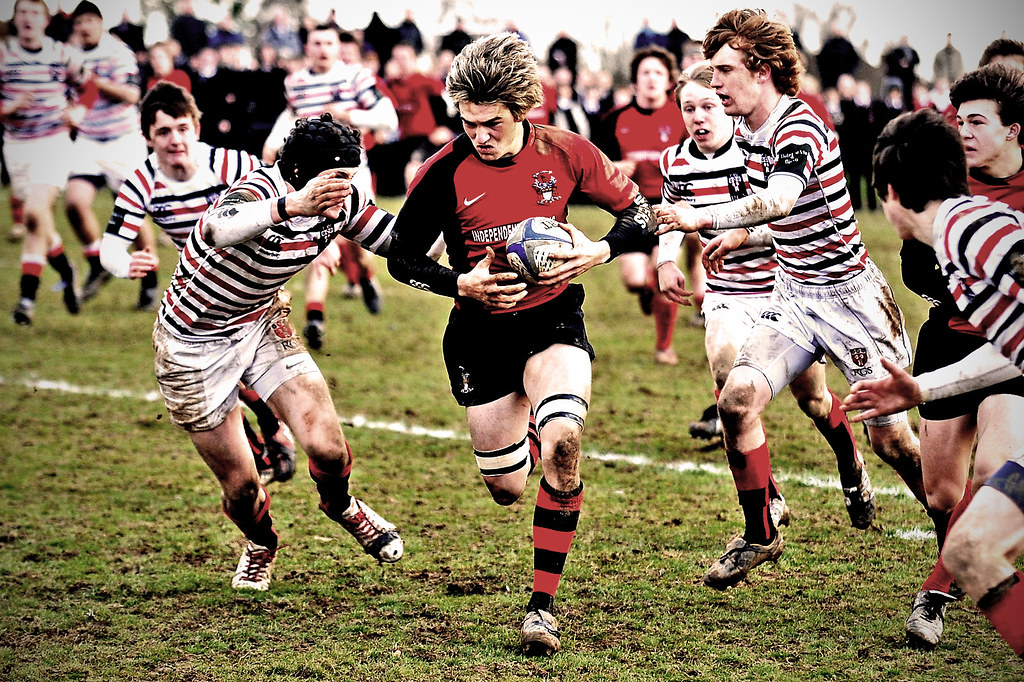
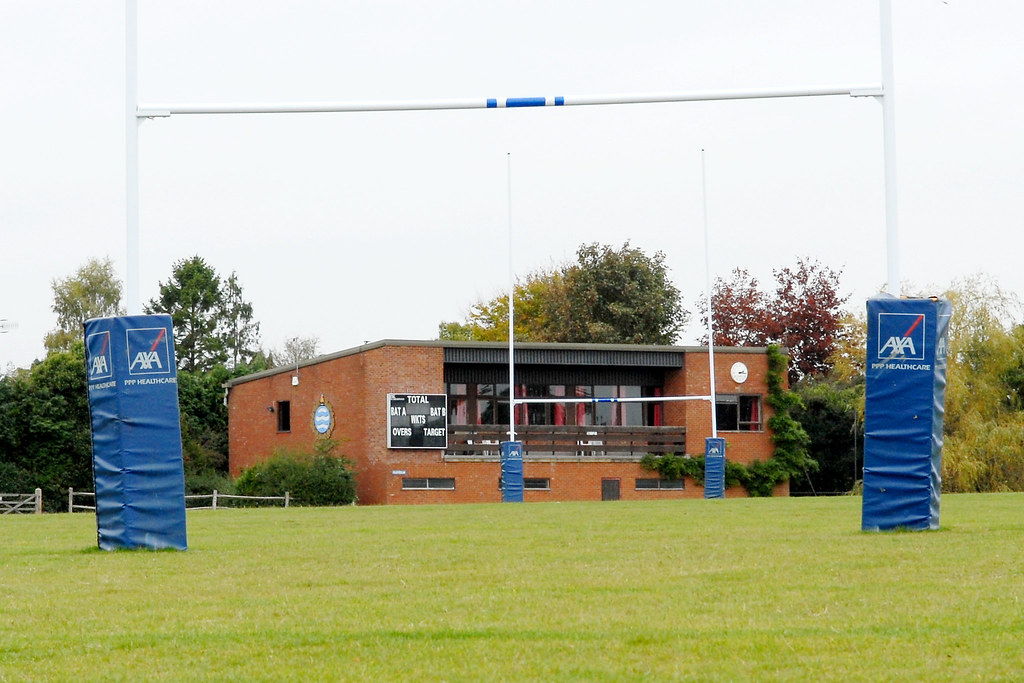
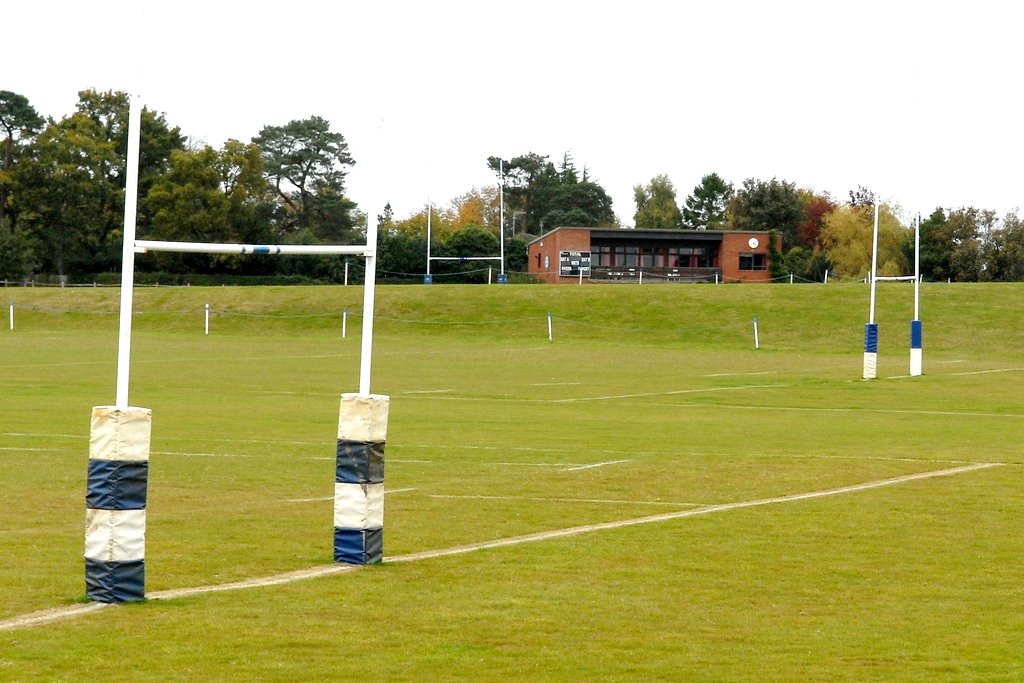
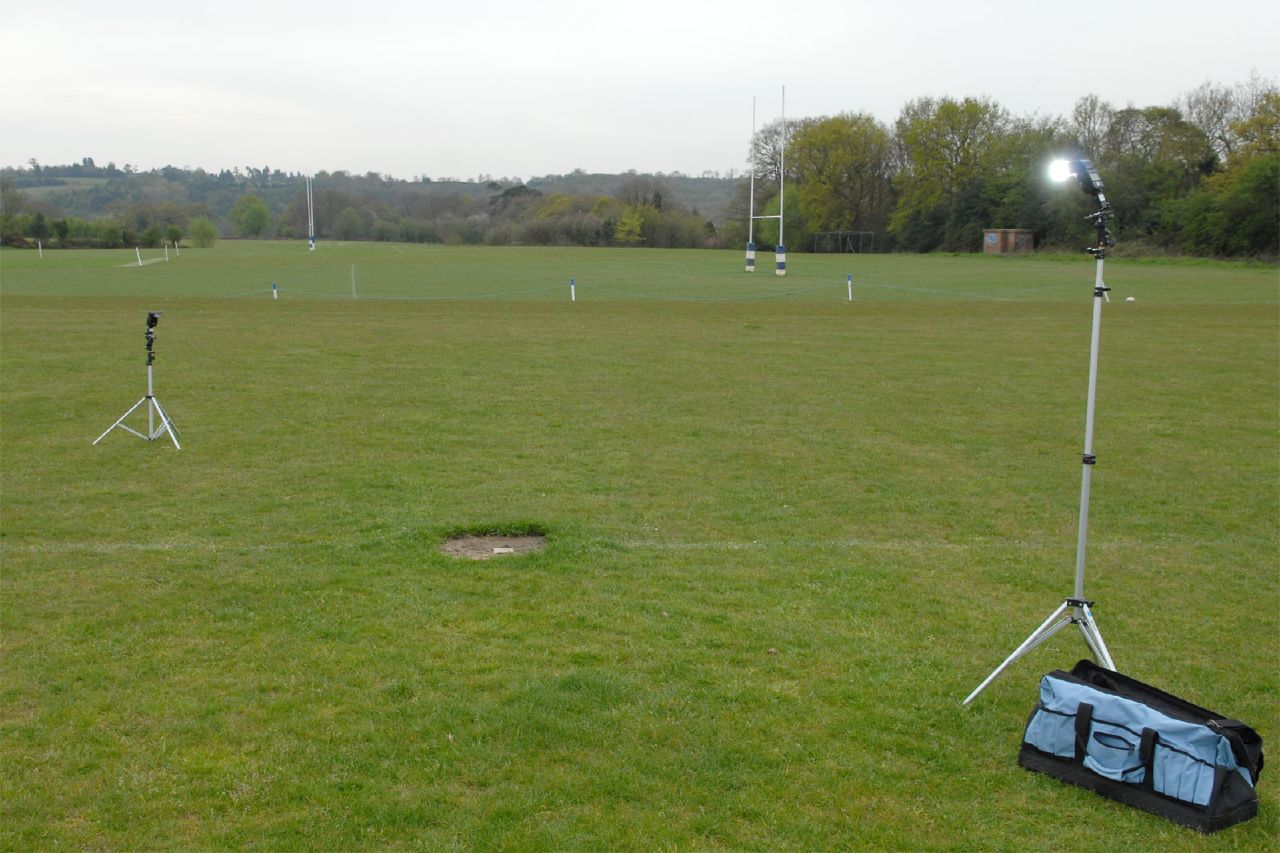
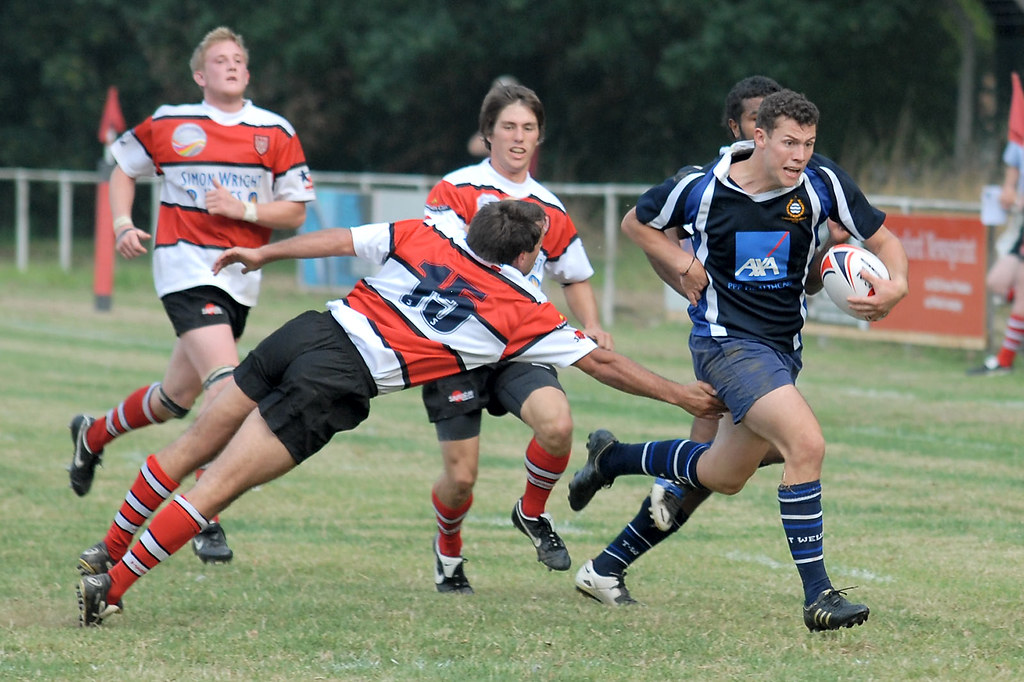
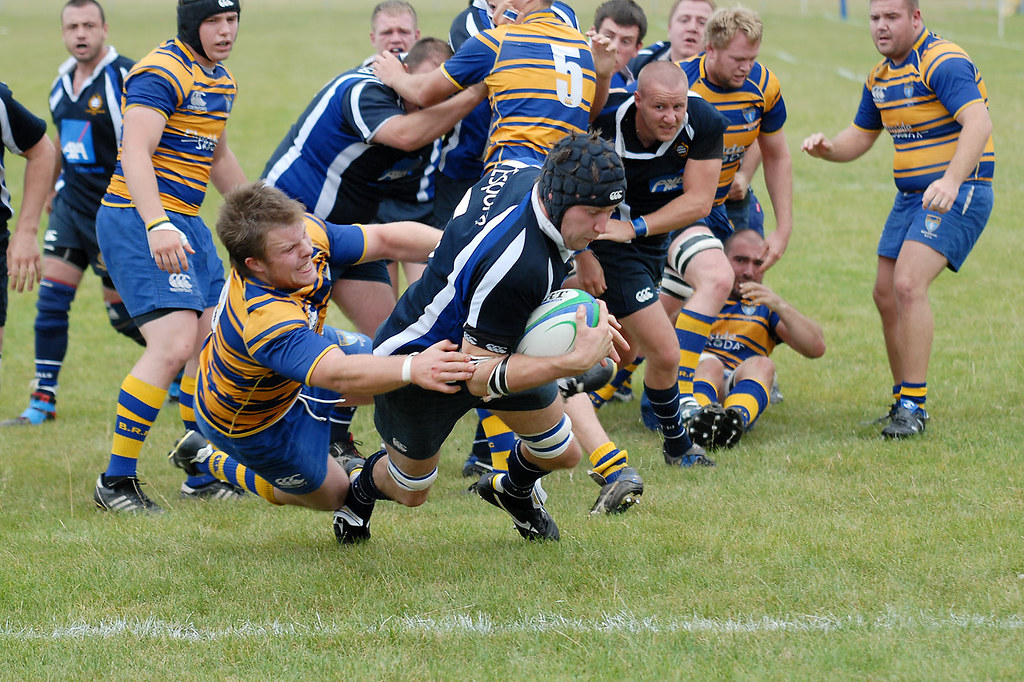
The other big question is where to stand for the best shots. Well for rugby, at the level that I shoot at, I can move around the pitch to an extent. I have two areas in particular that I spend most of my time at. Somewhere around the 22 is a good spot. I’m using a 70-200mm lens for rugby right now, and if my subject is more than about 20m away I’m not going to get the shot I want. The 22 gives me a range from the halfway line to the tryline and halfway across the pitch. If play breaks down around the 22 with my team attacking I move round behind the posts and shoot straight on.

090905-102

Don’t be afraid to crop your photos in post for maximum effect. As long as the image remains sharp, the bigger in frame the better is a simple rule of thumb!

21927

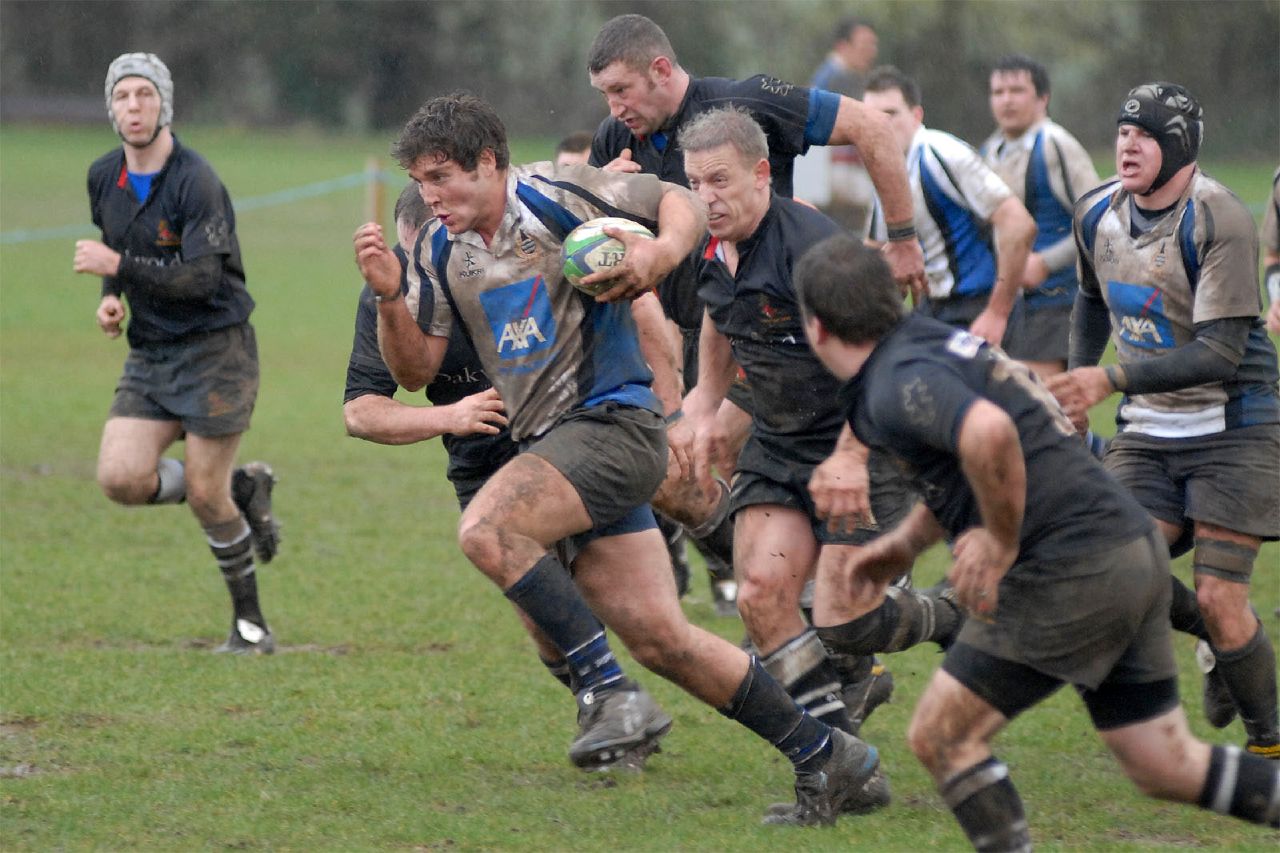
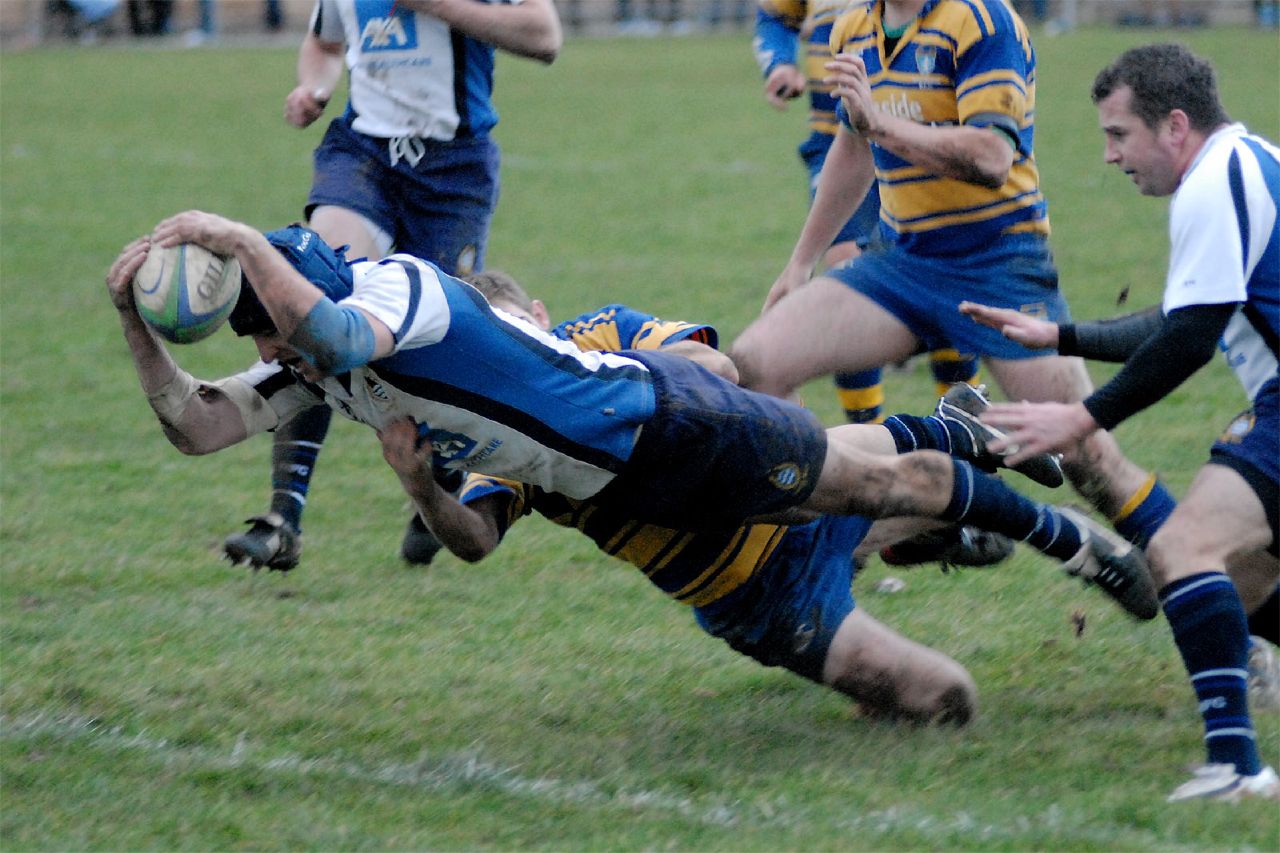
On an overcast day unless you are shooting with professional lenses, you will find it hard to get sharp images later in the 2nd half. Even with professional lenses, in the middle of winter it can be difficult to get a decent shot. If you’re shooting for fun, don’t give up. Just stand behind the posts and ramp up your ISO. You can get some really interesting shots of players coming straight at camera, with less chance of severe motion blur.

006741

If you’ve taken anything from this that’s helped you, let me know!

Sunday 18 October 2009

Tunbridge Wells Rugby Club

TWRFC gate

Most Saturday afternoons you’ll find me following the 1st XV from Tunbridge Wells Rugby Club.

My brothers played for the Club back in the late 80s and when I became bored of shooting landscapes it was a natural place to go and try my hand at Sports Photography.

091014-099-CH-DoublePosts-rev

Tunbridge Wells Rugby Football Club are part of the Tunbridge Wells Borderers Sports Club, and play their home fixtures at St. Marks recreation ground at the top of Frant Road in Tunbridge Wells.

The first team currently play in the London 1 South league RFU level 6, our second team play in the Invicta Leagues run by Kent County RFU as do our third and fourth fifteens who play in current mid Kent leagues, Mid Kent B and C respectively.
There is also a thriving junior and minis section which plays matches on Sundays throughout the season.

Rugby club Players entrance

The Club was originally formed as the Old Skinners' rugby football club in 1931 and remained linked to the Skinners’ school for many years, despite the increasing number of non old boys who played for the club. In 1970 it was decided that the club should become an 'open' club. This lead in 1973 to the club being renamed Tunbridge Wells Rugby Football Club, and to the club going from strength to strength since.

No Golf to be played

The Club currently have four pitches on a ground of some 23 acres, perched on top of a Wealden Ridge overlooking Frant in Sussex, and despite being a member of the Kent County RFU the Kent Sussex border runs through the middle of the 1st XV pitch with two pitches also being entirely in Sussex!

091014-104-CH-3pitches

More information on Tunbridge Wells Rugby Club can be found at http://www.twrfc.com(where you may recognise some of the above text!)

rugby club players entrance door hook

I plan to do a few posts on Rugby photography soon. Although if you look at the dates of previous posts you’ll have spotted I’m not a frequent poster.

Predator rugby training

Thanks for reading.

Sunday 8 February 2009

Sigma 70-200mm Macro

Sigma 70-200mm macro

Just a quick roadtest of the Sigma APO 70-200mm F2.8 II EX DG MACRO HSM.

This shot was taken at F5.6 1/320th @ ISO 200. Look at that DOF. This was taken at the minimum distance this lens focuses at which is constant through its full range at 100cm/39.4in and maximum magnification of 1:3.5.

I've done a quick curves adjustment, but nothing else. No sharpening.

Personally I've never used a macro lens before because it hasn't been a priority for me, and although this isn't a 'true' macro it looks like it's going to be fun. I can understand why light is so important for macro work now. If I want any kind of DOF I'm going to have to light my subject up to get a decent aperture.

I plan to use this lens mainly for sport and also for some theatre work so I'll be sure to post further results once I've had a chance to try it out.

Time for a post!

001763

Thought it was about time I posted something!

One I took a while ago. Just another demonstration of what you can do with one flash, handheld to the left.

As always I set my exposure to what I wanted for the background and then added light to suit the subject. Using Commander mode on a Nikon D200 I was able to select the Flash settings from the cam and change them as needed without wandering back and forth.

And here's one I took just as it was... no flash for a change!
001754

Thursday 8 May 2008

Pet photography

W21600 This was pretty much a one-off. It worked pretty well and I was pleased with the results but I was a little nervous of my lightstands! Pet photography isn't something I've tried much of. The dog behaved perfectly though.

I rolled up with 2 stands & a crossbar, a roll of white paper, another lightstand with a sb-800 and a shoot-thru umbrella. 5 minutes to set-up.

21564 And slightly more unlikely, a cat who cared more about the treats he was being offered than the flashes firing! Great fun.

Tuesday 29 April 2008

Crosslighting on an overcast day

Leni I asked for attitude for this shot! I'd just taken 30 portraits and called Leni back for something a little bit different from the usual smiles. Thanks Leni.

On days when it's sunny I'd use the sun as one 'light' and 1 flash to crosslight it. On a day like this it's one light at the front right, one back left. Start off by taking a shot with no lights. I'll normally do this on the S (shutterspeed) setting with my shutterspeed set at 1/250th which is the fastest speed that my flash units will synch at. Now take your aperture and shutterspeed for that shot and go to M (Manual) enter your shutterspeed as 1/250th but change your aperture by a stop so the next shot will be underexposed. Set your flash units on manual... start with one light at a time. I usually try the front light at 1/4 to start with and adjust it up or down as required. Once it's right I repeat with the back light. Sounds complicated but once you're done it a few times it's a quick process.

If you're shooting sports portraits like this and the players are holding a ball make sure they hold it on the opposite side to the front light. First time I tried this about a year ago I had the ball under the other arm and there was a really obvious dark shadow across the body. They were only test shots at the time but lesson learned.


014555
This is the setup. 2 light stands, front one set high, back set low... opposite each other diagonally from the subject.

5 minutes to set up and adjust settings, 5 minutes to photograph 30 lads. This is relatively easy to do and doesn't need to be that expensive if you're just starting out.

Cheap option: couple of 2nd hand light stands or cheap ebay stands, probably around £40 total. 2 flash units - I have 2 that I picked up from ebay as backups for £20 the pair. I only work with manual settings for flash anyway so they're as good as my Nikons for most things. Umbrella adaptors to link your flash to your light stand - £15 for a pair. Ebay remotes, 1 transmitter, 2 receivers - £30. Just over £100 in total.

Professional option: 2 Light stands - £120. 2 sb-800 flash units - £440. Umbrella adaptors to link your flash to your light stand - £15 for a pair. 3 Pocket wizard transeivers - £500. Over £1000 and we haven't started talking about light modifiers yet (umbrellas, softboxes, snoots, grids & gobos!).

You can break the bank buying all the latest kit, but if you're willing to improvise a little it's amazing what you can do with very little. My kit is a mix of both options, but gradually going over to the Pro option. Just waiting on those Pocketwizards now.

Monday 28 April 2008

Party photos

006136 I had someone hold the flash for me on this (high and left), but it would work in a similar way with on cam flash.

ISO 320, F7.1, Shutterspeed anywhere from 1/20th - 2 seconds depending on the effect you want.

The longer the shutterspeed the more light you let in from the background so you can get some pretty funky effects with this approach if you go for a long exposure particularly if there are room lights in the background. The flash will always 'freeze' your subject if you're in a relatively dark environment. This technique is all about livening up the background and giving the shot more life.

This exposure was about 1/2 a second. Enough to leave some movement in there but not too much.

Try it, just make sure you're in a relatively dark room!

Happy Birthday James.

Thursday 24 April 2008

Blogging in Tunbridge Wells

If you enjoy blogs of any sort you should check out Technorati. It's a bloggers search engine. I've got my favourite blogs and I decided to see if I was missing out on any from Tunbridge Wells.

A search on Tunbridge Wells turns up all sorts of things but for me there are three standout blogs, all of which I already knew as it happens, but I'll keep checking to see what else pops up.

Anke Royal Tunbridge Wells is probably the purest 'Tunbridge Wells' blog out there with snapshots of life in town posted on a regular basis. While you're there make sure you click on the 'Eat here' link for Anke's reviews of many local restaurants.

Street photography in Tunbridge Wells is my second choice. Turn up, dive in and set aside a couple of hours to really make the most of this wonderful blog. Great photos. I know I recognised a fair few people there. How about you?

Three beautiful things is written by Clare Grant who in her own words blogs every day to, 'record three things that have given me pleasure'. It's a great concept and a lovely blog. She's also behind Tunbridge Wells tells which greets its readers with, 'Tunbridge Wells has packed the last 400 years with eccentrics and colourful happenings ably recorded by newspapers, novels and diaries. What better way to celebrate 400 years than writing a 400-word account about living, working and playing in the town?'. The blog is a series of short essays by various people giving snapshots of life in Tunbridge Wells. Go and have a look.

I hope you enjoy them as much as I do.

Mix and match and a little photoshop!

003375a

I'm writing this after midnight having just finished processing photos from a dance show I covered last Friday. It's been a long day so I'm going to keep this fairly brief.

This is simply a shot lit by one Studio light through a large softbox, placed very close in and the kick light comes from a flash unit placed on the floor back left fired through a snoot to restrict light spill. The studio light is actually only about 2 feet from her, nicely removed in photoshop and replaced with the black background. The closer the light to your subject the gentler the light looks but that's another post!

There's nothing to stop you from mixing studio lights with flash units. If you're just starting out and you're looking to buy one studio light to start with play with it, but once you're ready to try some 2 light setups use a flash for a while until you're ready to splash out.

Tuesday 22 April 2008

What do you want to see here?

005185a-Teabreak If there's anything in particular that interests you that you'd like to see more of drop me a comment!

Are you here to look at photos? Do you want more informative posts on lighting and general photography tips?

Let me know what you'd like to see so I can target this for you.

Thanks.

Tom

DA23282-10x8Text Taken in the studio quite a while ago, but I love the look on his face so I thought it was worth posting.

Basic composition

001528-rev I'm not generally much of a landscape photographer, but once in a while I see something that I have to photograph. I love this photo. I took it last year on a family break in North Wales.

One of the reasons that this photo works so well is the 'rule of thirds'. If you placed a noughts & crosses grid across it you'd see that it's neatly broken into thirds horizontally with one vertical third in play as well. It's a simple method to improve your photography. Use it a lot to start with, then once you're sick of it teach yourself when to ignore it!


Of course I couldn't walk away from all of that moss without breaking out the lights and grabbing a quick shot of the kids. Once you're familiar with your equipment it really doesn't take a lot longer than just setting the kids in place. Just one flash unit for this one... on the right, held by my wife! From getting the kids out of the car to all done was probably less than 2 minutes.

001540

Crosslighting with the sun

001448 A simple technique that works beautifully is to have one flash on a light stand, in this case to the back right of my daughter and have the sun front left, with both light sources directly facing each other with your subject in the middle. The best examples of this type of photography that I'm familiar with can be found at the State of the Nation Blog. Set your exposure so that the Sun lights your subject nicely, then slowly build up your flash until you get the result you want, making sure that your shutterspeed is below your max sync speed on your camera. If that means nothing to you, but you want to know more, drop me a comment and I'll go into more detail in these posts to explain!

Monday 21 April 2008

Sunsets & Flash

Hattie

Recently went out to Ashdown Forest to take photos of a young couple. It's Callum again from the cricket dive post earlier. We knew before we went that we wanted to get the sunset in there and I decided to light them with a flash on a stand to the left and another on a stand to the right, both with gels on them to match the flash colour to the sunlight. This is a really simple technique once you've tried it a few times and it'll give you good results time and again.

When shooting at sunset start about 40 minutes before sunset and shoot for about 20 minutes after. It's tempting to walk away as the sun goes down, but you will get better light and a prettier background if you wait a little longer. You must keep adjusting your settings as the light changes. I'll cover that in another post.

The technical bit: sb800 w/ cto gel @ 45 deg right. full power @ about 4ft
sb600 w/ cto gel @ 45 deg left. full power @ about 6ft. Started off at F8 1/250th ISO 100 about an hour earlier... Around 1/30th F11 at this point.

Couple portraits 6

While we were waiting for the sunset we tried out a number of different poses and shooting styles. This one was actually Callum's idea. Thanks Callum.

The power of a flash unit

cricket ball flying catch Callum did work experience with me last Summer. It's nice that we;ve kept in touch and done other bits and pieces since. we recently talked about taking some shots to help him promote a cricket tour to Antigua later this year. This is what we came up with. It was a basic net practise and he wanted some shots of the lads just practising. I knew the location and knew I was going to struggle to get what I was being asked for with 'natural' light. I took light stands and flash units anyway and after shooting what I'd been asked for, we agreed to let me try something else.

I set up 2 flash units, 1 directly to the subject's left, 1 to the right. I knew that with natural light 1/250th wouldn't completely freeze motion so reminded of a post at Strobist a few days ago http://strobist.blogspot.com/2008/01/control-your-world-with-ultra-high-sync.html . I dropped the exposure until the background turned black and then added the light. 1/250th F5.6 ISO 200 (ish). This was taken in a normal Gym with normal gym lighting switched on.

cricket batsman

Pretty pleased with them.

Where can you take photos today?

Well it seems that even the Police and PCSOs are confused on this one. I saw a post recently from somone local who had been told to stop taking photographs in the Pantiles by a security guard because their camera looked professional. As it turns out the Pantiles is privately owned (surprised me too) so however frustrating this may be, if you're asked to stop taking photos you need to stop. The same goes for Wellington Rocks. If you're carrying a compact camera you're unlikely to be stopped, but more and more people are carrying dSLRs and the clearer everyone is on the legal aspects of photography the better.

The video here is a little dry in places but it sums it up nicely. Spotted it at http://tunbridgewellsphotography.blogspot.com/ (Well worth a visit if you like street photography). If you're in a public place in the UK, for the most part, you are legally entitled to take photographs (although there will be restrictions on what you can do with them beyond personal use). If you're on private property you don't have that automatic right and you should stop if asked.

Disclaimer: Not a lawyer or claiming to be one so if you're asked to stop taking photos in a public place and you believe you're entitled to be there don't quote me! Stop shooting, research it further and complain later.

Friday 29 February 2008

Where did the time go?

Ok...... I started out with good intentions.... honestly!

I have no excuse for leaving it as long as I have but one thing I would say is I have great respect for those bloggers who post every day without fail. I will never be one of them!

I'll be posting a few times in the near future, then we'll see what time allows.

Thanks.

Sunday 2 December 2007

Urban Rugby Calendar : The photoshoot

We arranged to meet at 8.30am on a Sunday morning in September. I was there shortly after 8am to check and prep my kit. By 8.45 there were 12 players with 2 kit bags, 2 sets of kit, a refereee, a physio and a couple of rugby balls.

002282

The plan was to shoot in 8 locations over 4 hours using my Nikon D200 with a 17-55mm F2.8 as the lens along with 2 lightstands, a Nikon sb-800 flash and a Nikon sb-600 flash. I should point out that pretty much everything I know about small flash lighting comes from Strobist. An absolutely fantastic blog run by a guy called David Hobby. He was a photojournalist for 20 years and recently started a year's break to see where his blog, and the community which has formed around it, would take him. There's an associated Flickr Group with over 17,500 members offering an incredible array of images and weeks worth of reading in the discussion pages. Well worth a look. I'll be coming back to Strobist in future posts.

002383

Back on track, most shots were lit with a flash unit to my left and one to my right aimed simply at the main subject. The first shot in this post is a setup shot for the lineout lift. I've used a simple crosslighting setup. One flash front left and one back right as shown in the shot above. When done properly it makes for really dramatic light. One of the best examples I've seen of crosslighting is the State of the Nation blog. He uses sunlight as one light and sets up his flash directly opposite to produce some great images.

002330

I'm not going to run through every shot but a few things are worth mentioning just for the fun of it. One of the first shots of the day was made on a zebra crossing. The main subject was on the pavement on the far side of the road making it look like he was about to throw the ball in..... Once I was ready we had to check the traffic, get everybody to run out in to the road, make the image and clear them away. Luckily at that time on a Sunday morning it wasn't too busy but it was good fun. It was pretty quiet at that time but by the time we got to Tunbridge Wells Station for the stud check on the platform it was getting busier. Lots of attention from the other platform and I think it's fair to say the lads were starting to have fun (hopefully). We shot the picnic in Grove Park.... One of the lads popped into The Compasses pub and asked if we could shoot inside. This was at 10.30am on a Sunday. The landlord was great and even ended up sponsoring a month for us. On to the Pantiles which by this time was really busy. There was a craft fair going on as well which was unexpected so all in all it was probably the most challenging place to shoot, but the results were good.

002314


It was a fantastic morning and although all of the images on this post are outtakes they show that it was a lot of fun and the end result looks good
.